
Add custom fonts to Xcode
If you want to use custom font in Xcode, you must first add it to the application.
1. Adding fonts to Supporting files
For example, simply dragging fonts to the directory “Supporting Files”. Create references to files, or duplicates himself here, so we have fonts as in the project.
customFonts1.png

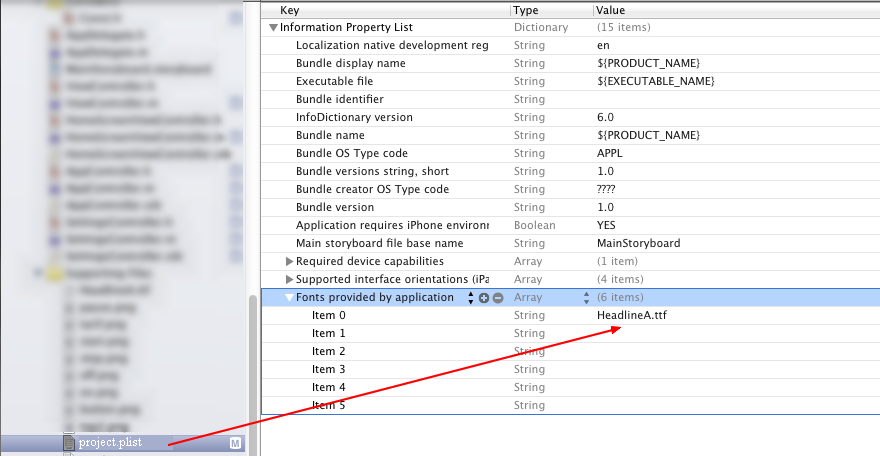
2. Adding into project-info.plist
As a next step, we need to add fonts as fonts supported by applications. Open the file. plist and we will add key “Fonts provided by application” and it will add value as the names of fonts.
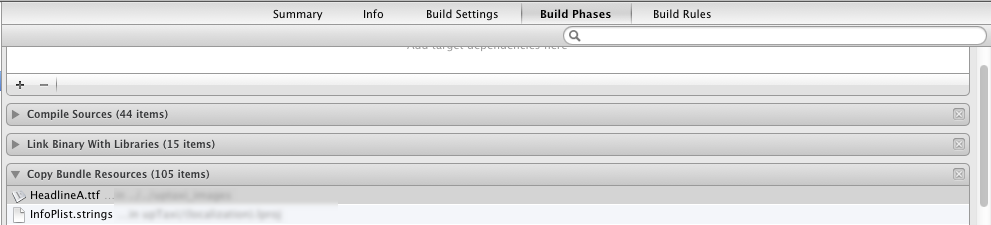
3. Check whether the fonts were added in the project
Open project name – Build Phases – Copy Bundle Resources and look whether fonts are in this bookmark. if fonts do not see here, we have to add them here.
4. Use fonts
Now we can use fonts. For example:
|
1 2 3 |
[myLabel1 setFont:[UIFont fontWithName:font3 size: 14]]; [myLabel2 setFont:[UIFont fontWithName:font3 size: 14]]; [myLabel3 setFont:[UIFont fontWithName:font3 size: 14]]; |
Hello! I really like your blog! Continue to write more! Very interesting!